Watercolor & Stamped Stickers

Do you love using stickers but don't want to spend a ton of money? In this tutorial, I'll be showing you how to make your own stickers with some supplies you may already have at home!
Be forewarned: making your own stickers can be fairly addictive and you may end up making lots of stickers for every occasion. :)
Materials List
The following list has all the supplies and tools you'll need to make this project.
These affiliate links help to keep Craftic running at no extra cost to you. Thank you for your support! 💛
- Tombow Dual Brush Pens - Bright set
- .75" Avery White Circle Labels
- Tombow Blending Palette
- Wooden Rubber Stamps with Flower Lace
- Studio L2E Doodle Icons 2 Acrylic Clear Stamps
- Tombow Water Brush, 3-Pack
- .75" x 1" Avery White Rounded Rectangle Labels
- Ranger Black Stamping Inkpad
- Vintage Plants and Flowers Silicone Clear Rubber Stamps
- .5" x .75" Avery White Rounded Rectangle Labels
No Machine Stickers Video Tutorial

Would you prefer to watch the video tutorial instead? Then watch the "DIY Stickers Without Using a Machine!" video on the Craftic Youtube channel!
Step 1 - Get Your Supplies Ready

First things first - grab your supplies. Pick out your favorite colors you like using in your planner or projects. Or pick out the colors you use in your color coding scheme.
Set aside the stamps that'll come in handy for your regular planning like icons for house chores, work, school, crafting - whatever it is you need!
In this tutorial, I'm using star-shaped and 0.5" circle labels. You can get them in lots of pre-cut shapes so check out your local stationery shop for more options.
Step 2 - Set Up Your Palette

Using the brush side of your Dual Brush Pen, apply the ink to the Blending Palette. This will create a color palette for you to work with.
Step 2a - Add Your Colors

In this step, feel free to squeeze water using your water brush on the Blending Palette to get lighter shades and more ink to work with.
Step 3 - Let's Get Painting

Using your Water Brush, pick up the ink and paint a few labels at a time until the ink is used up.
Step 4 - Paint Your Labels
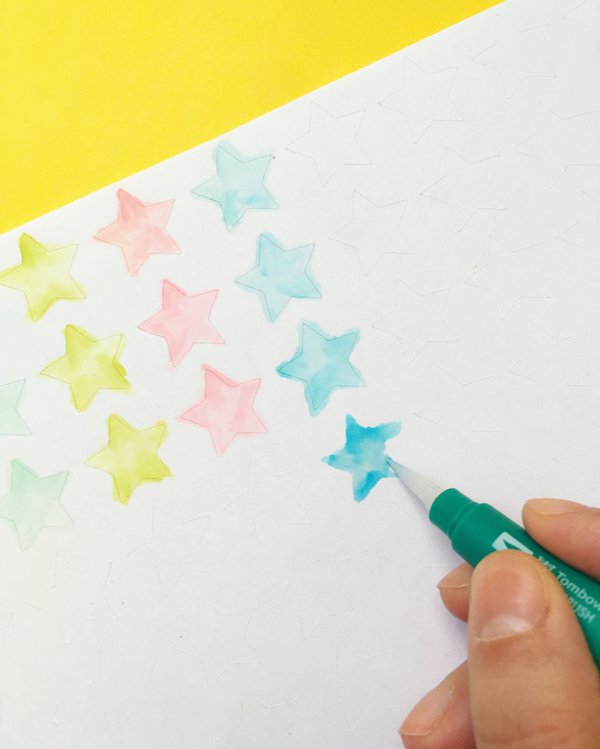
I recommend not squeezing water onto the label paper and just letting the natural flow of the Water Brush do its thing. You don’t want to oversaturate your stickers!
Step 5 - Get Decorating (without Stamping Ink)

Don’t have stamping ink? No problem! Get your Dual brush Pen (N25) and use it to color in your stamp.
Using the brush tip, apply ink to the stamp. Since the Dual Brush Pens are water-based, you can easily wipe off your stamps with a damp cloth.
Step 5a - Get Decorating (without Stamps)

No stamps? Use the 02 MONO Drawing Pen and doodle your own designs. The number dots here are my own hand writing. :)
Step 6 - Use Your Stickers

You'll want to let your stickers fully dry before peeling them off the sheet. If you remove them while they're still damp, they will most likely rip.
Feel free to use your stickers in your planner or whatever projects you'd like!
🎉 Final Step: Show Off Your Work!
Post your WIP and finished project photos on Instagram. Add #crafticProjects and tag @crafticland for a chance to be featured on Craftic's social channels and newsletter.