Paper Succulents
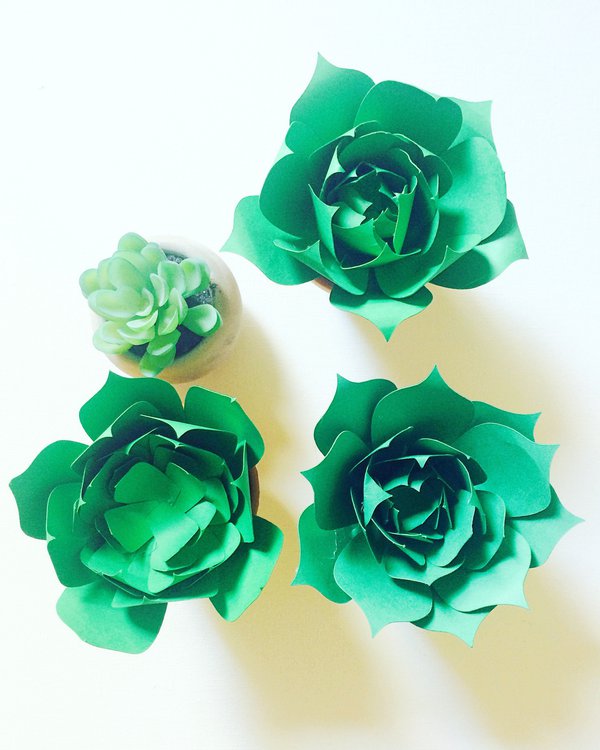
For those of you who don't have a green thumb (there's no shame!), these paper succulents are for you. :)

Materials List
The following list has all the supplies and tools you'll need to make this project.
These affiliate links help to keep Craftic running at no extra cost to you. Thank you for your support! 💛
Step 1
Cut out all petal pieces. You will need 30 petals in 3 sizes: 10 large, 10 medium, and 10 small petals. You will also need one 1.5″ circle (for the plant base).
Step 2
For all large and medium petals, cut a one inch slit at the bottom of the petal.
Step 3
For all large petals, overlap and glue the two slits on each petal (with the glue sticks). The overlap should be slight. This will help them prop up and give them a natural shape. For all medium petals, overlap and glue the two slits on each petal. The overlap should be more than the large petals. Do this for all 20 petals - 10 large and 10 medium petals.
Step 4
For the small petals, fold up about ¼ inch of the petal bottom. This bottom fold will help place the petals down when gluing them.
Step 5
Starting with largest to smallest, use the glue gun and place 5 petals on the circle’s outer edge. Repeat with 5 petals at a time for each layer, working your way into the center. You will have 6 layers of petals. Alternate the petal layers so the petals are between each other.
Step 6
Using a pencil, curl the outermost petals outward and the rest inward.
Step 7

Optional. Place in clay pot as your decoration!
Video Tutorial
For the full video tutorial, please visit the Craftic Youtube channel and check out the DIY Paper Succulents video!
🎉 Final Step: Show Off Your Work!
Post your WIP and finished project photos on Instagram. Add #crafticProjects and tag @crafticland for a chance to be featured on Craftic's social channels and newsletter.